So. Ok. Yeah. This...this Twisty
Cinnamon Rolls bake is unreal. Un-freakin'-real, people.
Like right now you're thinking a. this is not real and b. there's not a single chance in hell I can copy that. Both those are false.
Long have I been a'-search for The Perfect Cinnamon Roll and so many recipes, sigh, do not live up. I'm such a snob. But ask Mike too even, he's a bigger cinnamon roll snob than I.
It's like chasing that perfect yellow cake recipe; it's seemingly impossible to find.
Recently I a'-tumbled over this here recipe from Smitten Kitchen and holy bajeebus, I think my search might well be over.
Here's the thing about this recipe...well, there are a lot of things about
this recipe actually. It solves many a dilemma.
One, it's a big ol' pan of 'em so you can most certainly feed a crowd. Or, ahem, just two. Or you. No judgment.
Two, Mike, heh, he's an odd duck -- if I make a pan of cinnamon rolls, ya know, the normal way where you roll individual buns, he'll cut into the pan like it's a cake, blatantly ignoring bun borders. I know, I feel your anxiety peaking.
So these Twisty Cinnamon Rolls are not exactly individual buns, rather, rows so it's intended to be sliced. Anxiety released.
Three, this thing is freakin' gorgeous. You do not have to be any kind of advanced baker to achieve this gorgeousness, I swear and promise.
Ok, I don't know why I like to list things off. I'll move along from the
list format.
This recipe is a piece of cake (ahhh....haha, baking pun). It's practically foolproof and I've simplified some steps even further.
The filling is adaptable and flexible too. Bake this up as-written once first but after that feel free to add some nuts or nutmeg or other spices, or other things that interest you.
Don't go hog wild though. This well-tested and well-developed recipe is squarely on that razor fine line of perfection therefore a light breeze could send it haywire.
Speaking of well-tested, well-developed, this sure is without a doubt one recipe I wish I had figured out. It's not often that sense washes over me, but this one is so that-good, I feel serious baker envy.
This bakes up so tender, so delicious, so exacting, so just everything right, and bonus, it lasts several days without drying out. Personally, I think it's better the day after baking than the day-of.
There's an icing for this but, and this was a jaw dropper because Mike is extremely pro-icing, like don't ever leave it off, but he stated, with eye popping eyes of baking appreciation, that this does not need icing at all. And he is absolutely right. So in my personal opinion, skip the icing entirely.
You will have a very difficult time of not eating the entire pan in one sitting.
What else can I tell you? Hm. Bake this. Just bake it.
Bake it and see.
This does have an extended schedule to it so plan accordingly, but the time is mostly in rising/resting than hands on.
Get out the instant yeast, yeah, instant (I'm not an instant/rapid rise yeast person, more of an active dry but instant aids in the foolproof-y-ness here), toss it in your mixer* bowl with sugar and warm milk and then just keep going.
Add some eggs, toss in a bit of flour, give a mix around.
Add the rest of the flour, dash in the salt, and a stick of cubed cold butter...I mean, see? See how simple this is? Cold. You don't even have to room temp the butter.
A nice knead in the machine and let that carb-tastic pile rise baby rise.
After that first rise, time to chill. You can chill it for an hour or if you want, chill it overnight or up to forty eight hours before baking.
Ok! Time to roll! Flour up your surface well as it's a sticky
number, this dough. Not unmanageable, but keep the flour flowing.
Now, if you've got the counter space, go for the full
roll* out
of twelve inches by thirty plus inches. Eventually you're gonna stretch
the roll out to thirty six. A
tape measure* or yard stick is going to be very helpful here so track one down.
But! If you don't have that kind of real estate, no problem. Slice the dough ball in half, roll each half to twelve by fifteen one at a time. Problem solved.
Spread* on the melted butter, all of it, evenly over the whole thing, or in the half-sies case, two tablespoons per half. Go all the way to the edges. Yes, all the way.
Sprinkle the cinnamon dark brown sugar mix evenly over the whole thing or half
per half and again, go all the way to the edges.
Now roll.
Once you're rolled up, stretch the roll out to thirty six inches long, or in the half-sies case, eighteen per half. Divide the big roll in half, then those halves in half so you have four pieces at nine inches long each. In the case of the half rolls, cut each in half so again, you've got four pieces at nine inches long each.
On a
baking sheet* that fits into your freezer (and check first, trust me), lay each roll out
and freeze for fifteen minutes.
Now, ok, the pretty part. Grab a
serrated knife* and slice one of the rolls down the middle the long way. I like to
spin one half around 180° so that once twisted, there's not one small end and
one larger.
Set the halves facing cut side up next to each other, hold the ends together with one hand then grab one and flop it over the other to start the twist. The layers will try to unfurl and lazily protest but keep going, you can fix this later. Now pull the underside piece up and over the first flop, then keep twisting to the end.
Twist snugly but not too tight, and no need to twist the daylights out of it; a mere three or four twists is enough.
You'll need to do some tucking, some pinching, some forming, maybe some gentle encouragement, but it's not a big deal.
Ok, plop that twisted cinnamon roll length into a greased pan, finish the remainder, and give them a brief rest.
Because the cut ends are up, it'll be hard to truly tell if this is baked through by visuals alone. You can, but it'll be more definitive with a thermometer* which are inexpensive enough these days, it's a must-buy.
Wow. Just wow.
Wow.
Ok, try to let that cool a bit and have at it. Slice as desired.
I'm including the icing portion in the recipe, but again, you don't even remotely need it.
So yeah. Twisty Cinnamon Rolls. It's absurdly good. Like it should be illegal how good. Best go bake it right now that good. And I mean right now. Go. Bye!
*The stand mixers, 8 cup glass measuring cup, rolling pins, tape measures, pastry brushes, baking sheets, parchment paper, serrated knives, and thermometers are Amazon affiliate links. Happy baking, thanks! Please see the "info" tab for more, well, info.
Like right now you're thinking a. this is not real and b. there's not a single chance in hell I can copy that. Both those are false.
Long have I been a'-search for The Perfect Cinnamon Roll and so many recipes, sigh, do not live up. I'm such a snob. But ask Mike too even, he's a bigger cinnamon roll snob than I.
It's like chasing that perfect yellow cake recipe; it's seemingly impossible to find.
Recently I a'-tumbled over this here recipe from Smitten Kitchen and holy bajeebus, I think my search might well be over.
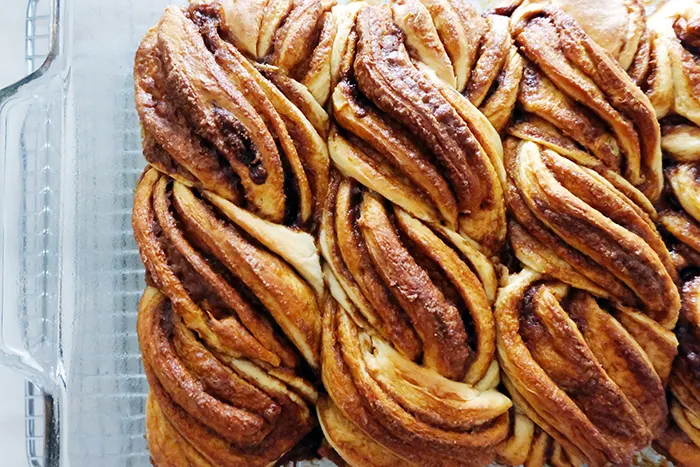
|
|
Yeah, for real, this is real. Seriously. |
One, it's a big ol' pan of 'em so you can most certainly feed a crowd. Or, ahem, just two. Or you. No judgment.
Two, Mike, heh, he's an odd duck -- if I make a pan of cinnamon rolls, ya know, the normal way where you roll individual buns, he'll cut into the pan like it's a cake, blatantly ignoring bun borders. I know, I feel your anxiety peaking.
So these Twisty Cinnamon Rolls are not exactly individual buns, rather, rows so it's intended to be sliced. Anxiety released.
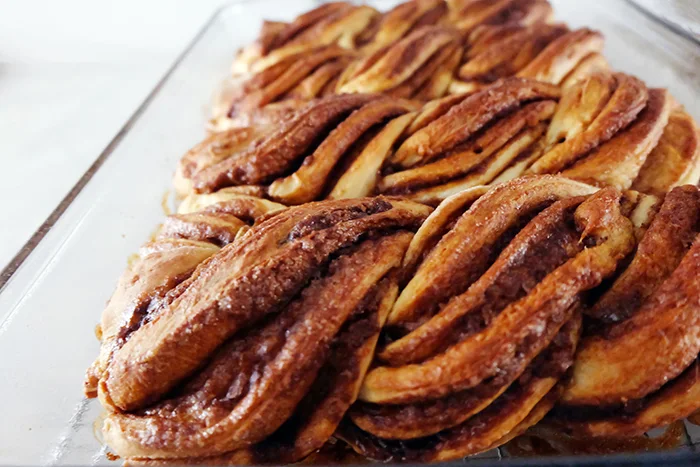
Three, this thing is freakin' gorgeous. You do not have to be any kind of advanced baker to achieve this gorgeousness, I swear and promise.
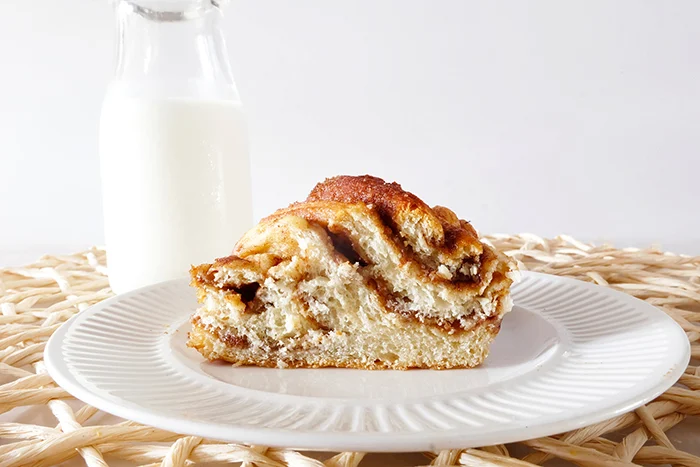
|
|
I mean.....come. on. |
This recipe is a piece of cake (ahhh....haha, baking pun). It's practically foolproof and I've simplified some steps even further.
The filling is adaptable and flexible too. Bake this up as-written once first but after that feel free to add some nuts or nutmeg or other spices, or other things that interest you.
Don't go hog wild though. This well-tested and well-developed recipe is squarely on that razor fine line of perfection therefore a light breeze could send it haywire.
Speaking of well-tested, well-developed, this sure is without a doubt one recipe I wish I had figured out. It's not often that sense washes over me, but this one is so that-good, I feel serious baker envy.
This bakes up so tender, so delicious, so exacting, so just everything right, and bonus, it lasts several days without drying out. Personally, I think it's better the day after baking than the day-of.
There's an icing for this but, and this was a jaw dropper because Mike is extremely pro-icing, like don't ever leave it off, but he stated, with eye popping eyes of baking appreciation, that this does not need icing at all. And he is absolutely right. So in my personal opinion, skip the icing entirely.
You will have a very difficult time of not eating the entire pan in one sitting.
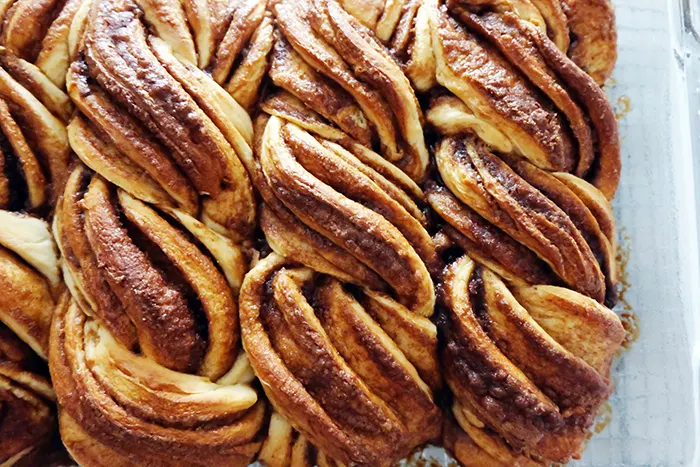
|
|
I know, they hardly look real they're so....so everything. |
This does have an extended schedule to it so plan accordingly, but the time is mostly in rising/resting than hands on.
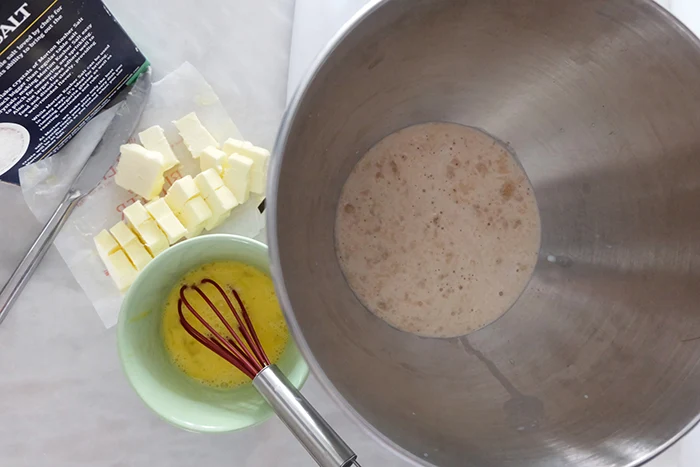
Get out the instant yeast, yeah, instant (I'm not an instant/rapid rise yeast person, more of an active dry but instant aids in the foolproof-y-ness here), toss it in your mixer* bowl with sugar and warm milk and then just keep going.
Add some eggs, toss in a bit of flour, give a mix around.
Add the rest of the flour, dash in the salt, and a stick of cubed cold butter...I mean, see? See how simple this is? Cold. You don't even have to room temp the butter.
A nice knead in the machine and let that carb-tastic pile rise baby rise.
After that first rise, time to chill. You can chill it for an hour or if you want, chill it overnight or up to forty eight hours before baking.

|
|
Got this
8 cup Anchor Hocking measuring cup* to mix up that fresh
homemade buttermilk
in recently and man, whooo, why did I not buy it sooner. Such a
handy vessel. |

|
|
Left, look at those air bubbles! Top, that's half the dough (see
explanation below), and then bottom, I am way jumping ahead of myself
rolling up the roll. |
But! If you don't have that kind of real estate, no problem. Slice the dough ball in half, roll each half to twelve by fifteen one at a time. Problem solved.
Spread* on the melted butter, all of it, evenly over the whole thing, or in the half-sies case, two tablespoons per half. Go all the way to the edges. Yes, all the way.
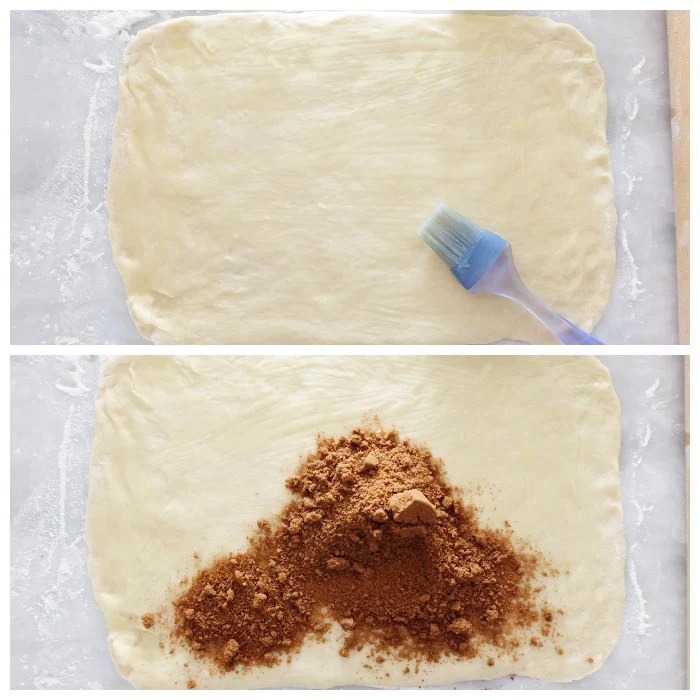
|
|
Butter to the edges, top, then add the filling. |
Now roll.
Once you're rolled up, stretch the roll out to thirty six inches long, or in the half-sies case, eighteen per half. Divide the big roll in half, then those halves in half so you have four pieces at nine inches long each. In the case of the half rolls, cut each in half so again, you've got four pieces at nine inches long each.
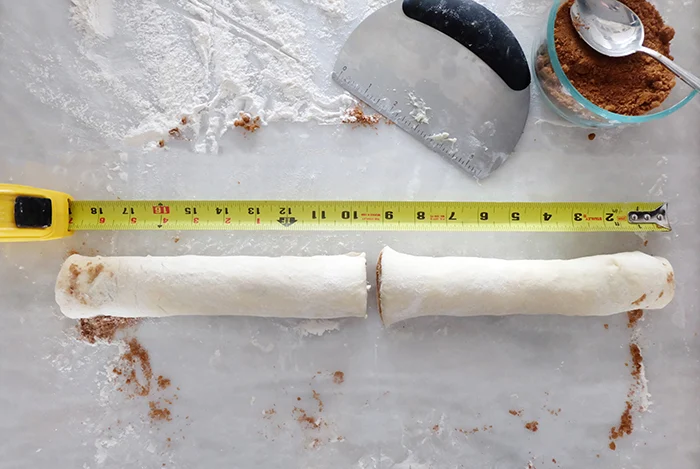
|
|
I'm a little over 18" here but that's ok. |

|
|
You can line the sheet with
parchment paper* or wax paper if you'd like though I found it unnecessary. |
Set the halves facing cut side up next to each other, hold the ends together with one hand then grab one and flop it over the other to start the twist. The layers will try to unfurl and lazily protest but keep going, you can fix this later. Now pull the underside piece up and over the first flop, then keep twisting to the end.
Twist snugly but not too tight, and no need to twist the daylights out of it; a mere three or four twists is enough.
You'll need to do some tucking, some pinching, some forming, maybe some gentle encouragement, but it's not a big deal.
Ok, plop that twisted cinnamon roll length into a greased pan, finish the remainder, and give them a brief rest.
Because the cut ends are up, it'll be hard to truly tell if this is baked through by visuals alone. You can, but it'll be more definitive with a thermometer* which are inexpensive enough these days, it's a must-buy.

|
| #foodporn |
Wow.
Ok, try to let that cool a bit and have at it. Slice as desired.
I'm including the icing portion in the recipe, but again, you don't even remotely need it.
So yeah. Twisty Cinnamon Rolls. It's absurdly good. Like it should be illegal how good. Best go bake it right now that good. And I mean right now. Go. Bye!
*The stand mixers, 8 cup glass measuring cup, rolling pins, tape measures, pastry brushes, baking sheets, parchment paper, serrated knives, and thermometers are Amazon affiliate links. Happy baking, thanks! Please see the "info" tab for more, well, info.






I made these for christmas morning and baked them in two batches. The first pan I did for the time stated in the recipe and they came out almost burnt. The second pan I did for 20 minutes, I checked them at 17 minutes and they were perfectly done. I also checked the temperature and the temperature was as stated for being done. So the baking times were way off for me. Otherwise the recipe was good.
ReplyDeleteAh sorry the baking times were a hair off for you but I hope they were still delicious! Everyone's oven runs a bit different for sure and some days even my own varies. Thanks for baking these and I hope you had a great holiday!
DeleteSince I needed to give this out as gifts to 3 people, I made one, each, in fancy loaf pans, and gave the whole, individual braid, in the pan, as a gift!
ReplyDeleteHow can I be on your gift giving list? Wow, lucky recipients! And what a great idea too, three separate loaf pans to give away. Thank you for sharing your great idea!
Delete